This how-to will walk you through validating a certificate signing request (CSR) in cPanel.
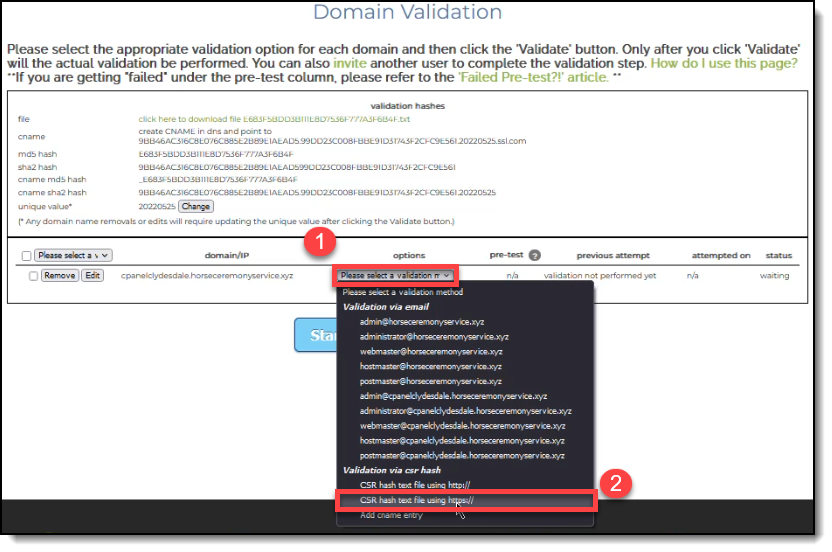
In the validation page, select the CSR Hash validation method: either http:// or https://. If you have an auto-enforced https, you can use https://
 Proceed to cPanel home page and click File Manager which is where you can manage the files for the server, particularly for the website itself.
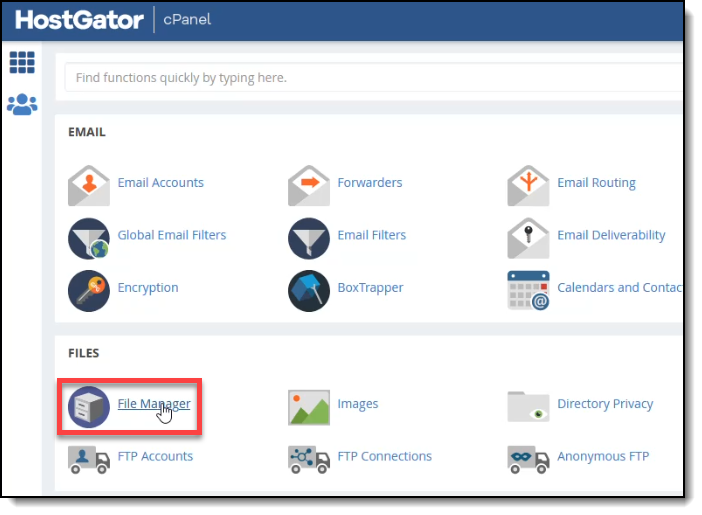 Click the public_html folder and then create a new sub-folder called .well-known.
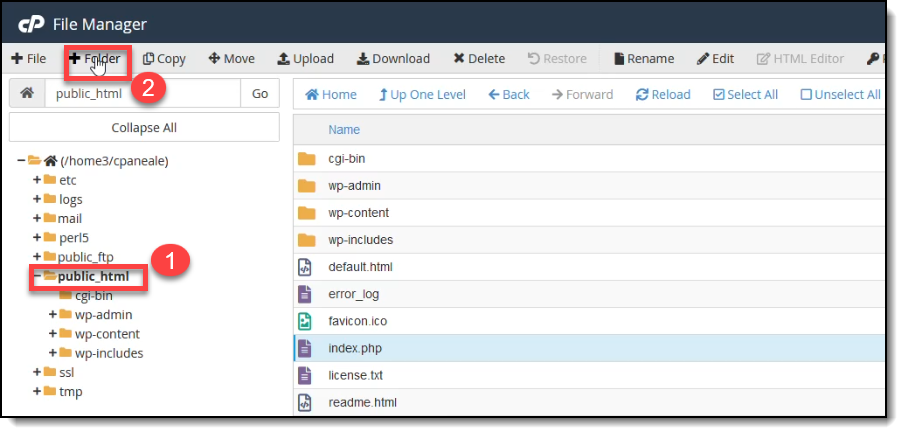 Take note that once the .well-known folder is created, it will not immediately show up on the list to the right.
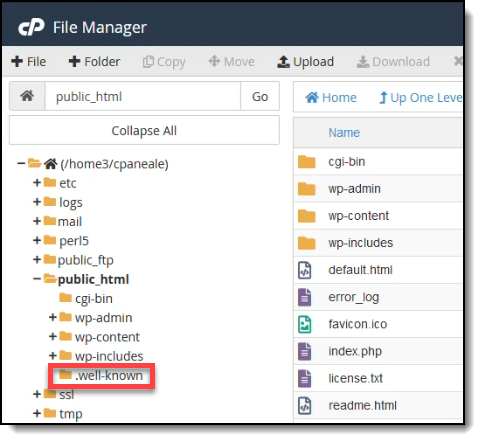
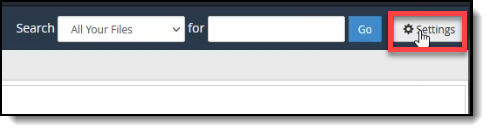
For the .well-known folder to appear on the right side, Click Settings on the top right corner.
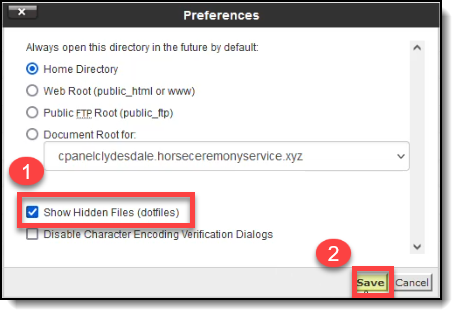
Check the option to show hidden files and then click the Save button
Upon clicking the Save button, the .well-known folder will now appear on the right panel. Proceed to open the folder.

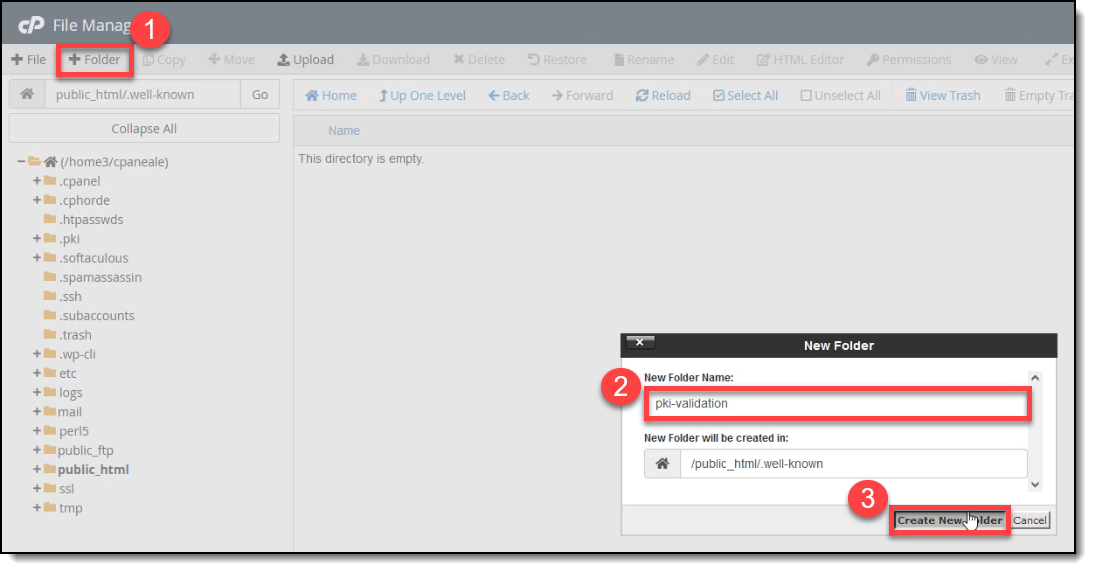
Create a new sub-folder, name it as pki-validation and then click the Create New Folder button.
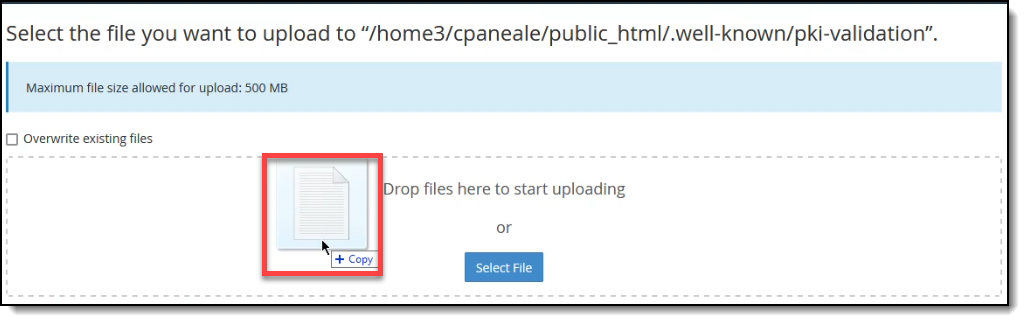
 Open the newly-created pki-validation folder and click the Upload button to upload your text file.
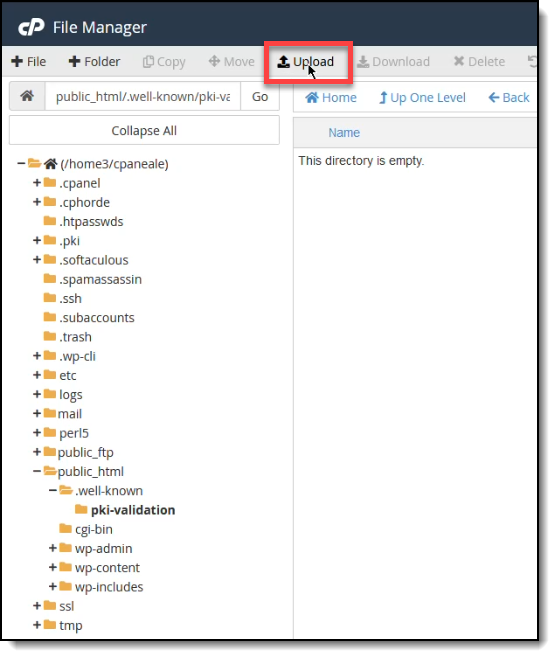
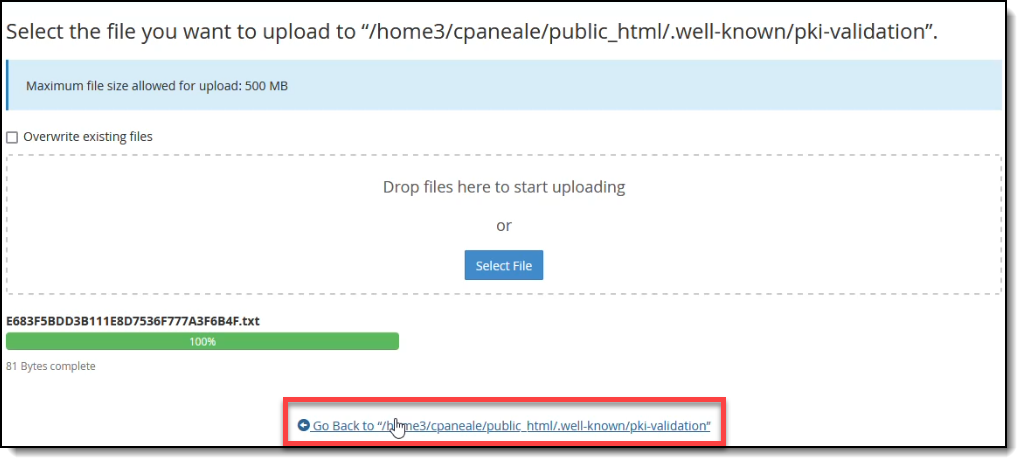
UPLOAD THE CSR HASH FILE TO THE PKI-VALIDATION FOLDER Drag and drop the CSR hash file and wait for it to be completely uploaded. Once it’s complete, click the link leading back to the pki-validation folder
 Check if the CSR hash file has been successfully uploaded to the pki-validation folder.
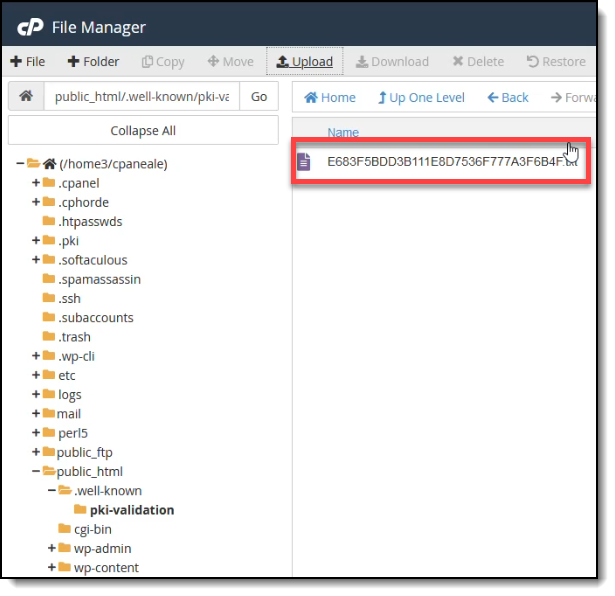
Refresh your website to see if the CSR is now available.
 Go back to the validation page on your SSL.com account. Refresh the page. Select the option to validate via CSR hash
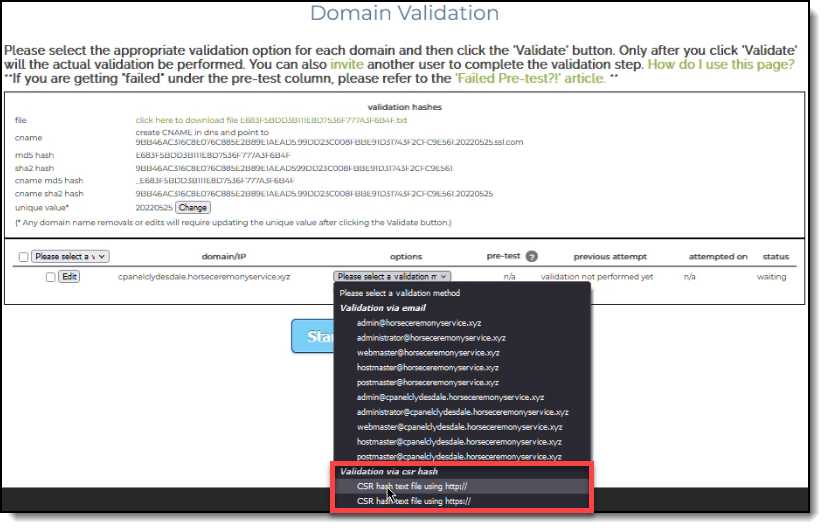 On the pre-test column, you will see the status change to passed. After this, a message box will appear stating: “All domains have been validated, and the certificate will be issued soon. Redirecting to Certificate Order Page now…”
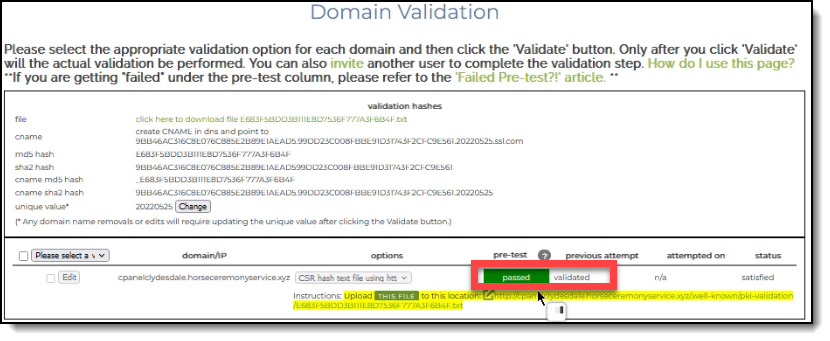 Upon being redirected to the Certificate Order Page, you can see that your order has now been successfully issued. Scroll over to the WHM/cpanel download link to download your SSL/TLS certificate.
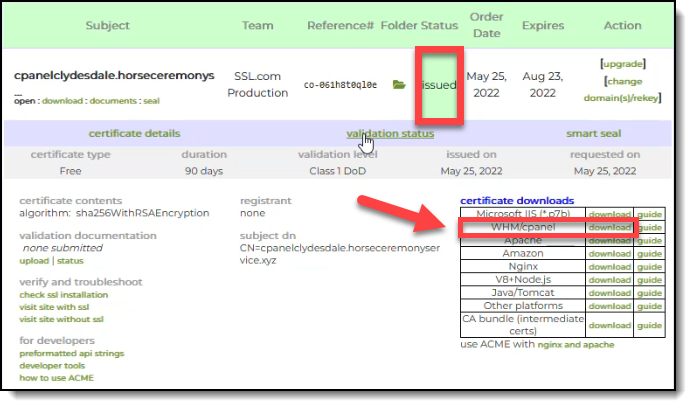 You can then proceed to install your SSL/TLS certificate in cPanel. To be guided on this process, please read our article Certificate Installation in cPanel.